Can I solve Haunted Paws puzzles alone?
A solo-only mode stays Unverified. Shared doors wait for the second hold. Party options are on co-op.

Haunted Paws puzzles guide for two-puppy doors, carried objects, keys, and synced switches in the mansion. Room names stay incomplete. Verified October 2026.
Two-fish keys, factory doors, and ID cards.
~14 min read
Haunted Paws puzzles are the two-puppy prompts in Steam Demo 4992280, live October 8, 2026, from LazyFlock. A door, a carried object, a key, or a switch waits until both puppies do the job the prompt names. The full game (Steam 2861080) is still TBA, so this page stays on the rooms the demo actually opens. Verified October 24, 2026 · demo store page · full store page.
The verified set is short. Hold a door together. Carry the fish, the tools, the flashlight, and the ID card. Trade two fish for the worker's car keys. Dig the card the factory doors ask for, then tap it. Later, one puppy turns a wheel while the other drives forward and back. Sliding shelves from preview writeups stay Unverified. If the prompt is a smell, leave the lever and use the clue board.
| Prompt | Both puppies | Done when |
|---|---|---|
| Apartment door | Hold or pull the same door together | The door opens. A single tap leaves it shut |
| Carry | One mouth holds the fish, tool, flashlight, or card. The other keeps the path | The object reaches the cat, the mechanic, or the door that asked |
| Boost | One puppy climbs on. The other pushes | The top puppy can hit the prompt above |
| Street keys | Find two fish. One is close. One is inside with the night-shift worker | The cat pays with keys and you return those keys to the worker |
| Factory doors | Dig the hidden ID card, keep it, tap the locked doors | The doors that asked for the card accept it |
| Later car | One puppy turns the wheel. The other works forward and back | You pass the on-screen warning about driving into objects |
| Synced shelves | Preview writeups only | Unverified in this demo. Use the door rule if two plates appear |
| Solo retry | A solo-only mode is Unverified | Bring the second puppy from co-op before you retry the hold |
Say the role before either puppy grabs. One puppy holds, carries, or watches the prompt. The other moves, fetches, or stands on the second side. If you both take the same object, the prompt sits there until you speak again. Haunted Paws puzzles fail in silence more often than they fail for a missing item.
Swap once, and only once, before you invent a third mechanic. The puppy who was carrying becomes the puppy who waits, and the other way around. A second swap means the object is the wrong object. Go back to the last sentence the game printed. Party setup for the second puppy is on co-op.
There is no verified tank, scout, or carrier breed. The October 19, 2026 looks change who you can see. They do not change who is allowed to hold a door. A kitten-in-disguise fur is still one of the two puppies. Stats and weapon puzzles stay off this page because none are verified.
Coats are how you keep the callout honest. If both puppies are the same color, you will swap the pedal and the wheel later and only notice when the car backs into a wall. Set that on the breeds page before the street.
A broken window, a claw mark, or a shoe is a clue, and the clue page is where those pins live. Forcing the apartment door harder will not write the factory sentence. Finish the role split here, then use the next section the first time a door ignores one puppy.
Matched by build plan, shared topics, and guide progression — not random related links.
Apartment doors that separate you are a shared hold. Both puppies grab the door, then pull or hold until it moves. One press from one puppy is how a pair loses the first minute. In demo play the prompt is the hold itself. One session calls that hold G, and another talks about holding a different key. Use the bind your screen shows.
The same idea shows up as "grab this side and pull back" and as "pull it together." Call which side you have, then stay on it. Letting go to sniff a toy resets the hold. If the door opens and a creature is already in the gap, the puzzle is over and the creatures page is the next read.
| What you see | Do this |
|---|---|
| The door ignores a tap | Both puppies grab and hold. Wait until it actually moves |
| Your hold does nothing | The other puppy is not on the door yet. Call the side |
| You swapped and it still waits | You are on the wrong door, or one puppy stepped off |
| A chase starts in the doorway | Both puppies use a door you opened on the way in |
| A preview mentions a sliding shelf behind the door | Leave that shelf Unverified until the shelf is on your screen |
Some prompts want a puppy on top of an object and the other puppy pushing from the floor. Demo play at the factory uses that boost to reach a high interact, including a treat shelf on the way through the same building. Say who climbs and who pushes before either of you jumps. Clipping through your partner means you step apart and grab again. That is a position miss, and the door or the ledge will still be there.
The demo opens the apartment, the street, and the factory approach. It does not hand you a labeled mansion map. A later door uses the same hold if the prompt is a hold. The factory doors in a later section are different: they want a card, and holding them harder will not invent the card. The next section is what those mouths should be carrying while any door is still shut.
Carry means one puppy's mouth and a destination. The demo objects that matter are a fish, a second fish, a flashlight, a screwdriver, a wrench, and the ID card. Toys, a duck, snacks, and a carrot in the same room are easy to pick up and easy to waste. Haunted Paws puzzles count the object the prompt named.
Pass the flashlight when the other puppy needs to read a note or see a hole. Dropping it in a corner is fine if you say where it fell. Dropping the ID card and walking off is how pairs reach the factory doors empty-mouthed. Wide crates that both puppies must shove, and shelves that slide after a synced switch, show up in preview writeups. They are Unverified in the demo footage checked for this page. If your build shows two plates, use the door rule: one puppy each, hold, swap once.
| Object | Who holds it | Hand it to |
|---|---|---|
| First fish | Whoever sniffed it on the street | The cat detective, then go find the second |
| Second fish | The puppy who takes it from the night-shift room | The same cat. The other puppy is already on the exit |
| Flashlight | Whoever is reading | The other puppy, passed in place, when the note is dark |
| Screwdriver, then wrench | Whoever finds the tool the mechanic named | The mechanic with the broken leg. He refuses the wrong tool |
| ID card | One mouth, from the dig until the doors | The locked factory doors. If the mouth is empty, walk back and pick the card up |
| Hamper, carrot, toys | Easy to grab | Unverified as puzzle items. Drop them when a real prompt is waiting |
Analysis of the game lists switches, bookshelves, and hidden passages that want both puppies at once or one after the other. That shelf room is not a scene you can point at in the current demo. Mark it Unverified. The both-at-once prompt the demo does show is the shared door, plus the boost where one puppy climbs and the other pushes. Hunt those. Leave the bookshelf until a prompt names it.
A shaking box during the tool hunt is a scare. Leave it closed. If it opens, both puppies run. It is not a synced switch and it is not the wrench.
You can carry one important object into a chase and lose the door because of it. For the second fish, the puppy with the fish runs, and the other puppy is the one who already opened the way out. The next section is that fish trade. The card comes after you are inside the factory approach.
The first key handoff is on the street, before anyone is driving. A worker on the night shift has lost the car keys. A cat detective then blocks those keys behind two fish. The line in demo play is the deal: bring two fish, and the keys are yours. A spoken name for that cat in one session stays Unverified. Follow the fish line.
One fish is close enough to sniff from the conversation. Hand it over. The cat asks for another one like it. The second fish is inside, with the worker who would rather be home. Grabbing it in the open starts a chase, and a slow door is a hit. Demo sessions cut the lights or the power in that room first, take the fish, and leave through a door they already opened.
| Step | Where | Watch for |
|---|---|---|
| Worker lost the car keys | Street, night-shift line | The keys are not in the truck yet |
| First fish | Close enough to sniff from the cat | Hand it over. He asks for another |
| Second fish | Inside, with that worker | Lights or power off, then grab. The other puppy holds the exit |
| Pay the cat | Same cat | Both fish. A carrot in that room stays Unverified as a substitute |
| Return the keys | The worker who lost them | He heads to the factory and he drives. You can ride in back |
Say who takes the fish and who owns the door before you touch the counter. Barking in that run keeps the chaser with you. Treats and a carrot on the same counters are easy grabs. The cat's deal is fish. The worker, the spider-bodied figure later, and every other chase route sit on the creatures page.
After the cat pays, walk the keys to the worker. Keeping the keys and looking for your own ignition on that truck is the wrong prompt. The worker drives this stretch. Your own wheel-and-pedal car is a later scene, after the factory doors.
He thanks you and points the trip at the factory. A sign on that approach tells you to find a way in. Read the company name off your own sign, then follow the board if it already wrote a destination. The next section is the locked doors inside that approach, and the card they want.
A hideout conversation blocks the deeper factory doors. They are the only way through, they are locked, and an ID card is hidden nearby. Dig there. The camera lifts off the puppy into a top-down view of the hole. Stay on the prompt until the card is in a mouth. That dig is the puzzle. Random dirt with no camera change is the wrong spot.
The same stretch has a boost, missing posters, and a spider-bodied creature. The boost is optional height. The posters are optional reading, and you pin one only when the board has a question they answer. The creature is a run. Come back with the card still in a mouth.
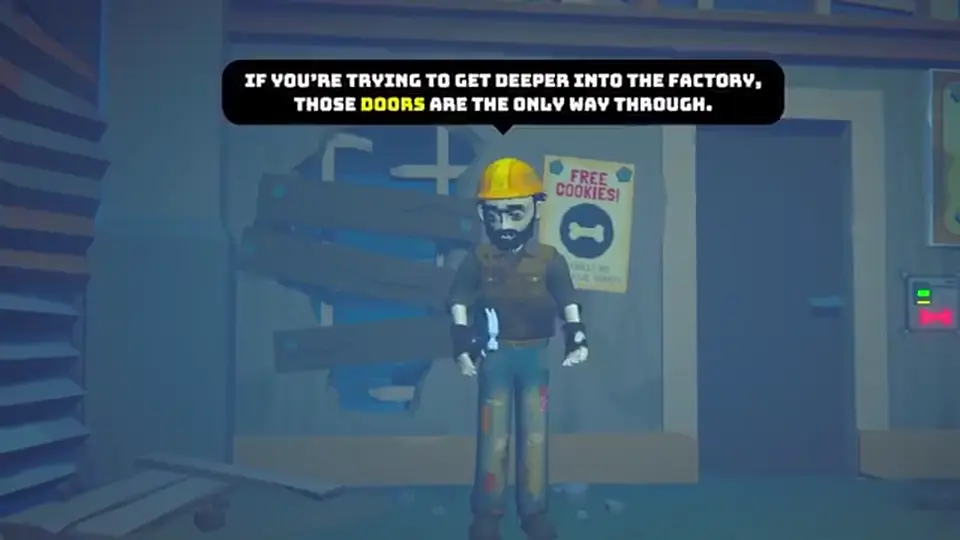
| Beat | What you do | Done when |
|---|---|---|
| Hideout line | Read it. The doors are the only way, and they want a card | You know the dig is nearby, so you stop shoving the doors |
| Dig | Use the spot that lifts the camera to a top-down hole | A puppy is holding the ID card |
| Hall | Keep that mouth full. Run if the spider-bodied figure is in the way | You are back at the doors with the card |
| Empty mouth | The card was dropped. Walk back and pick it up | You are holding the same card. A second dig stays Unverified |
Pass the flashlight if the hole is dark. Keep the card in the same mouth on the walk back. A shared-hold door elsewhere still wants the hold. This card is only for the doors the hideout named.
The next section is the reader. The usual miss there is an empty mouth. The car you drive comes after the doors take the card.
This is the same card from the dig, at the moment you spend it. The doors were locked in the hideout line. You already dug. The miss at this step is an empty mouth. Demo play walks back, picks the key card up where it was dropped, and taps it on the doors. The doors respond to that tap. You do not dig a fresh card because the first one left a mouth.
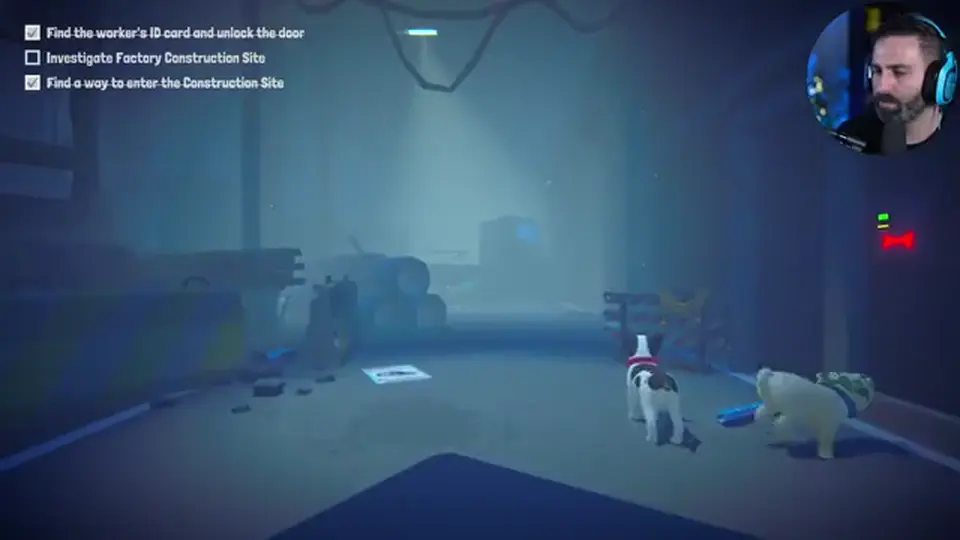
One puppy carries the card from the hole to the reader. The other puppy clears the hall. If a spider-bodied creature is in that hall, both of you leave and come back with the card still in a mouth. Fighting it is not a verified puzzle solution. Routes for that figure are on creatures.
Once the doors take the card, this errand is finished. Extra treats, posters, and a high boost in the same rooms are optional. The next section is a different scene: a mechanic, two tools, and a car the puppies drive themselves. That car does not reuse this card.
The street truck was the worker's. This car comes later. A mechanic with a broken leg is fixing it so he can leave a monster behind, and he cannot reach his tools. He asks for a screwdriver first. Hand him anything else and he sends it back. Then he asks for a wrench. Search drawers and the floor. The shaking box in that room is a scare, not the toolbox.
When the car is fixed, he still cannot drive on the broken leg. The puppies take the two jobs. One turns the wheel. You can see that wheel move. The other sends the car forward and back. Play sessions of the demo call that second job the pedals. He then steps out, tells you to keep the car, and the worker from the street is no longer the driver.
| Job | Puppy | What the demo shows |
|---|---|---|
| Screwdriver | Either mouth | He names it. The wrong object is refused |
| Wrench | Either mouth | Drawers and the floor. Leave the shaking box closed |
| Wheel | One puppy | The wheel turns while that puppy steers |
| Forward and back | The other puppy | Sessions call this the pedals. Follow the words on your prompt |
| After he steps out | Both of you | Keep the car. Extra gas stops stay Unverified as a required puzzle |
That split is on screen in demo play. A control label that is absent from your prompt stays Unverified. Use the words the car prints. Pick the jobs before you roll. Swapping mid-ride is how you back into the thing you were trying to miss.
An on-screen line in that ride tells you to avoid driving into objects. The steer puppy calls the turn. The pedal puppy eases off. If your prompt names the jobs differently, obey the prompt. The verified fact is the split itself: two puppies, two jobs, one car.
There is still no numbered mansion walkthrough, no weapon dropped by a door, and no synced bookshelf you must slide to finish the demo. Those stay Unverified or out of scope. When the car is moving, you already have the puzzle set this build teaches: shared doors, carried objects, two fish for keys, one dug ID card, and a wheel plus pedals.
If the board still does not name a destination, go back to clues before you hunt another vehicle. The beginner guide has the apartment order. The demo page has how long this build runs. The FAQ is the solo question and the shelf question.
Next: pin the smell that sent you to these doors on the clue board.
The second puppy joins from co-op. When a grab turns into a chase, use creatures.
Apartment order is the beginner guide. How far this demo goes is demo length. Console dates stay on platforms.
A solo-only mode stays Unverified. Shared doors wait for the second hold. Party options are on co-op.
Room names stay incomplete. This page covers the demo prompts: doors, carries, two fish, the ID card, and the later car.
No weapon system is verified. A wrench is a tool for the mechanic, and a chase still means you run.
One puppy turns the wheel. The other drives it forward and back. Demo sessions call that second job the pedals. Follow the words on your prompt.
Walk back and pick up the card you already dug. A second dig stays Unverified.
Sliding shelves and synced switches from preview writeups stay Unverified until that prompt is on your screen. The demo hold is the door.
The deal on screen is two fish. A carrot in that room stays Unverified as a substitute.
Looks only, so you can tell the roles apart. See breeds.
Matched by build plan, shared topics, and guide progression — not random related links.